Activity: Seed Planter
Use the seed planter attachment to start your own little garden. Organise your garden layout and have the rover precisely deposit seeds in soft soil. Cover it up as you go, and finish with some water!

Activity Demonstration
Setup
For this task, you must purchase some garden seeds of your choice, research planting conditions, and find how far apart seeds must be planted. Prepare a garden bed or ground area to ensure the soil is tilled and soft. Get two long beams of solid material and lay them parallel to the rover tracks (the rover will use these like a train).
The seed planter attachment works by retracting the seed paddle in the tank, allowing seeds to fall into its hole. The paddle then flicks out, and the seeds in the hole fall into the cone. Then, the attachment drives the cone into the ground, pushing the seeds into the dirt.
Once all the prep is done, load the seeds into the seed tank on the attachment and program the rover to move and plant them at the correct intervals. Once a row is complete, move the beams to the next row and go again. Repeat until your garden bed is complete!
Note that the height of the planting cone may need to be adjusted depending on how high the robot is from the soil.
Here’s Our Approach
Constant - A constant is a variable that never changes when the code is run. In python, we write this in all capitals with underscores between words.
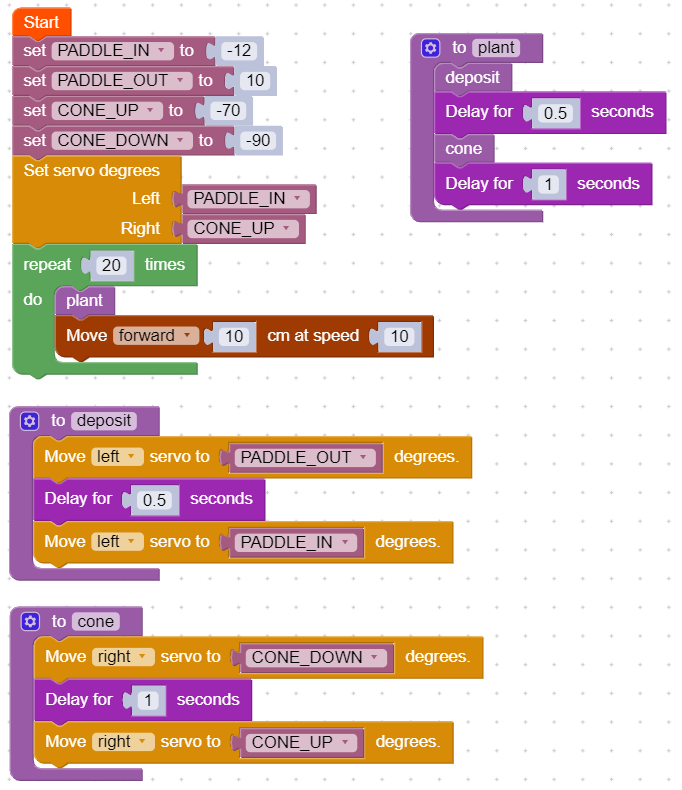
1) Setting the Constants:

Start by making constant variables to store the in and out positions of the paddle and the cone up and down positions.
The constants we have provided might need to be tweaked for your specific rover. This can be done through trial and error to find the best values for you.
2) The Deposit Function:

Off to the side, we’ll create a new function, ‘deposit’, which will flick the paddle out, wait for a bit, and flick back in. Remember to use the paddle constants for this.
3) The Cone Function:

Off to the side, we’ll create another function, ‘cone’, which drives the cone down, waits for a bit and brings the cone back up
4) The Plant Function:

A ‘plant’ function should also be made using the ‘deposit’ and ‘cone’ functions. First, the seeds are deposited into the cone, and after a slight delay, the cone drives the seeds into the ground.
5) Prepare the Servos:

Back in the main code, the servos should be initialised to the ‘paddle_in’ and ‘cone_up’ positions. This is to ensure the servos are in the correct positions before starting.
5) The Planting Loop:
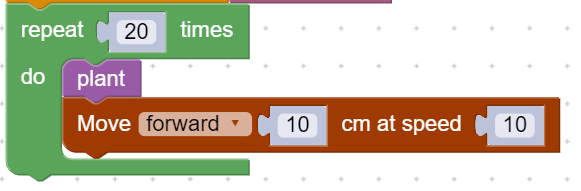
Finally, create a loop that will execute several times, corresponding to how many seeds you want to be planted. Inside this loop, run the ‘plant’ function, then move the rover forward to plant the next seed.
Complete Code:
Tip:
Try making your own seed paddle and cone with different-sized holes for your different seeds. That will help you add a bit of variety to your garden!
Related Posts


