Creating A Sumo Unit For Your Digital Technologies Class
Sumo is a great cumulative activity to run for digital technologies classes. Sumo algorithms incorporate branching, iteration and requires students to understand data types from different sensors. This blog post will cover:
The digital technology learning objectives in sumo units,
Setting up for sumo battles,
Assessing successful sumo solutions,
Building knowledge needed for sumo.

What Skill Level Is Sumo Appropriate For?
Sumo is a great challenge for students of any skill levels. For a student, the difficulty of a sumo challenge is set by the opponent they have to defeat and since students normally battle each other, they generally end up as fairly matched opponents. However, as the teacher you can still determine how difficult the opponent rover will be meaning sumo can be a challenge for any skill level and can be continuously challenging for students. You can even seed different algorithms to students to attempt to battle as their skills progress.
Learning Objectives in Sumo Units
Branching, Iteration & Algorithm Design
To compete in the sumo ring, students will need to design and program a sumo algorithm that utilises branching and iteration. Sumo algorithms will typically use:
Branching logic using IF / Else / Else If and conditional operators (>, <, ==, !=). The more complex the student's algorithm, the more sophisticated the branching logic will need to be as more conditions are introduced.
Iterating their logic using a variety of Loops.
Understanding & Analysing Sensor Data
Using sensors effectively is the key to a successful sumo robot. Students will need to intimately understand how to gather and use information and data from the environment in their programs/algorithms. Possible sensor usage in sumo algorithms can include:
The colour sensor, which is the most utilized sensor. The colour sensor is used to detect the edges of the sumo arena and keep the rover from leaving.
The Infrared (IR) distance & ultrasonic distance sensor is used to locate opponents for offensive moves, like charging or pushing.
More sophisticated algorithms may use the gyroscope & accelerometer. An example is using the accelerometer to detect if the rover is being tipped over by the opponent to deploy defensive measures.
The Design Process & 3D Modelling
Sumo units can even be expanded with 3D printed attachments for the rover e.g. battering rams or shovels attached to the front of the rover. Including a 3D printing component to your sumo unit allows you the opportunity to cover Design and Technology curriculum requirements. For example, students can explore 3D printing technology, its sustainability and other pros and cons relative to other manufacturing methods. After they have a satisfactory understanding of 3D printing, they can dive into an iterative design process to create a sumo attachment. This can include:
Ideation, design thinking and planning sketches on paper,
Critiquing other design and understanding constructive criticism,
Creating their 3D model in 3D modelling software like TinkerCAD or even Blender for older students.
3D print the design and attach it to a rover ready for sumo.
Testing different materials for 3D Printing, like ABS or PLA.
Team Management & Planning
Sumo works well as an individual and team-based challenge. Having students work in pairs or teams allows more opportunities for creative collaboration over the design of their algorithm. As with other digital technologies challenges, you can organise your teams such that each student handles a specific component of the desired algorithm or robot and then have students cooperatively merge their work into the one algorithm. This is often a slow way to approach programming for students however it forces students to practice explaining their thought process and code to their peers. Being able to successfully explain their code to others is indicative of quality communication skills and general understanding.
Setting Up For Sumo Battles
To the right is an example diagram of a simple sumo setup. The grey circle is the sumo ring and the border for the sumo area. Inside the arena there are normally two rovers battling. The two rovers are in their default starting position, with backs facing the middle of the ring.
Below we will outline the complete rule set used for this setup as well as general notes around setting up and organizing your sumo ring.
Arena Shape
There is no limitation to the shape that you can use for your ring. We always use a circular sumo arena when running sumo units as this matches real sumo arenas. Other shaped arenas, e.g. square or octagon will work just as well as a circular arena.
Arena Size
For a circular arena with 2 rovers battling we recommend a diameter of 50cm-60cm (or about 5 rover lengths). Ideally you’re arena is big enough that the rover’s have room to move around in without constantly hitting each other but also not so big that they end up too far separated and cannot find each other. The more rover’s you intend the include in the battles, the larger the arena will need to be.
Starting Positions
We recommend starting rovers back-to-back or side facing. Starting rover’s face to face will often lead to head on collisions immediately that won’t be very interesting and don’t always allow students to get creative with their algorithms.
Line Colour
The colour sensor will be the primary tool students can use to detect the sumo arena walls. Having the wall colour contrast the floor clearly will make it easier for the rover colour sensors to detect the wall. For example, white arena with a black line, or vice versa. This allows students to use the brightness of the line rather than actual colour making the process much simpler. For a challenge make a red or orange ring and let students explore out what works for them.

Octagon shaped sumo arena made with masking tape on the floor making for a very cheap setup.
Other Notes On Setting Up Sumo
Avoid using an sumo arena that has walls or including physical obstacles inside the arena. The ultrasonic and IR distance sensors aren’t able to determine if they are detecting an opponent rover or a wall or other obstruction.
Leave some space around the sumo arena. This will prevent rovers detecting objects outside of the ring like students sitting down or chairs and driving outside arena mistakenly.
Sumo Rules
We recommend that you establish your sumo rules before students start designing their algorithms as the rules will change how students create their algorithms. Here is our general ruleset for sumo and the same ruleset we use in the example sumo diagram depicted above. Feel free to copy or iterate on these rules to use it in your unit:
Sumo Battle Setup
All rovers start inside the arena with backs facing the centre of the ring.
All competitors must start their code at the same time on the referee’s call.
Sumo Battle Rules
Nobody is allowed to interfere with the rovers besides the referee.
The battle is over once all but one rover is defeated. The final rover in the ring is declared the winner.
The referee can call a stalemate if rovers are in an unwinnable situation for 10 seconds. The referee can either restart the match or declare a draw.
A rover is defeated when one of the following conditions are met:
It has been knocked out
It has been incapacitated.
It is disqualified by the referee
The referee will remove rovers from the battle once they have been defeated.
What is a Knockout
When the majority of the rover’s is outside the arena. The referee decides when a knock has happened.

What is Incapacitation
A rover is considered incapacitated if:
The rover is unable to move on it’s own, e.g. tracks fallen off or obstruction from attachment
The rover’s program has stopped running.
What is Disqualification
The referee can disqualify a rover if the rover’s code does not move. The rover must attempt to battle while in the match.
Organising Who Battles Who
When you are planning your sumo unit you will have to decide how you will organise who is battling against who. Let’s go over some pros and cons of ways you can organize sumo battles.
Free For All or Team Battles
We recommend sticking with Free For All battles where all rovers battle on their own. Team battles are possible but they can be frustrating if rovers on the same team start knocking each other out. This isn’t as fun for students just starting out in their programming or sumo journey but can act as an added challenge once students have started doing well in battles.
How Many Rovers In The Ring
There’s no limit to the number of rovers you can have in the ring for a battle. It’s good to start with 1v1 as a starting point for students to start developing their algorithms. Expanding to >2 rovers at once in the ring can be good fun once all students have finished their algorithms. We recommend you don’t associate these larger battles with any assessment item as they’re wildly chaotic and not a good way to gauge the quality of a sumo algorithm.
Student vs Student or Student vs Teacher
Students will want to battle each others rovers. There’s nothing wrong with this and it will likely be the most common type of practice. However, it is also a good idea to have a pre-programmed sumo algorithm ready before students begin developing their algorithms. While students are developing their algorithms they can spar with your prepared rover AI. This is a great way for students to iterate on their algorithms.
The Micromelon Robot Simulator provides a few different levels of AI Sumo Algorithms that students can battle against before they even get into real sumo battles. This can be a great starting point for your sumo units and is also an excellent tool to practice these concepts outside of class time or when other classes or students are using the arena and robots.
We like to make our prepared AI very difficult and so they act as a “final boss” for students to strive to defeat. We’ll get more into how you can make use of Artificial Intelligence (AI) rovers in creating a standardized and fair assessment for your sumo unit in the assessment section below.
Expanding Sumo With 3D Printed Attachments

Including 3D printed attachments in your sumo unit is a great way to give students more creative freedoms when designing their sumo algorithm. It can also offer opportunities to integrate an iterative design process and learn more about 3D printing as a manufacturing process into digital technologies classes. This can also provide an excellent introduction to manufacturing and industrial design concepts used in senior subjects.
Assessing Successful Sumo Solutions
The goal of running any digital technologies unit is to allow students the opportunity to demonstrate understanding of digital technologies learning objectives through application. Criteria to assess students' understanding of the concepts being taught doesn’t have to be pass or fail based on whether the students wins a sumo match or not. Let’s talk a bit about what makes a good sumo solution and then look at different ways we can create assessment items to measure students capabilities.
What Is A Good Sumo Solution?
In general terms there are two ways to categorize sumo algorithms: complexity and efficiency.
Complexity
A sumo algorithm will become more complex as more conditions (most commonly introduced from utilising more sensor data) are programmed into the algorithm. For example, an algorithm that utilises the rover’s accelerometer, Infrared (IR) distance, ultrasonic distance and colour sensors will inherently be more complex than an algorithm that uses just the colour sensor. The more complex algorithm will require a wider and more thorough understanding of more sensors. Understanding how sensors work and how to write a complex algorithm is only one part of a good sumo solution.
Efficiency
Sumo algorithms also need to be efficient at correctly positioning and pushing opponent rovers out of the ring. Creating an efficient algorithm requires an understanding of material robotics concepts. For example, understanding how to account for acceleration and momentum of rover movement or understanding how friction will grip an opponent rover to the sumo floor and ways of destabilizing it. Understanding these concepts are even more relevant if you are using 3D printed attachments which create more variables to consider.
Complexity vs Efficiency
In general, the more complex the sumo algorithm is, the more efficient it will be. However, this isn’t always true. Complex algorithms utilising many sensors may still move poorly in the ring and be easily defeated by a less complex algorithm. The difference between sumo and other digital technologies activities is that more advanced students are able to produce a less complex algorithm that is still very efficient. We don’t want to punish them for having a simple algorithm that is highly efficient.

To the right you can see an example of a less complex but still efficient sumo rover from a workshop we ran at a school in Brisbane. The winning rover just moves forward slowly with the bigger attachment. This is definitely not a complex algorithm but regardless the student has demonstrated an understanding of how to counter the opponent rover and has created an efficient sumo rover.
Balancing Complexity and Efficiency With Learning Objectives In Mind
The purpose of the sumo unit is to give students an opportunity to demonstrate a satisfactory understanding of the learning material. If students are creating simple but efficient algorithms, they may not be giving themselves the chance to demonstrate their understanding of the algorithmic design and interpolation of data expected for their grade bracket. In this case it’s important that you create expectations for how complex of an algorithm you want students to produce. If your students should be comfortable creating an algorithm that utilises multiple sensors, then we recommend you enforce this with algorithm rules written into the assessment. We’ve included an example of this in our example assessment in the next section where we specify a minimum number of rover sensors students are expected to include in their algorithm.
Defeating AI Opponents
The simplest way to gauge the quality of a sumo robot is to see it battle another robot in the arena. We do not recommend you make student vs student sumo battles a criterion of your assessment. This doesn’t promote a healthy classroom environment if students are competing for grades. We still encourage you to have students compete against each other but in a less competitive manner. Student vs student battles can be incentivised with other prizes like chocolates or stationary to practise or showcase capabilities without having actual sumo battles.
For battles that are associated with marks, having students compete against Artificial Intelligence (AI) or pre programmed opponents is much more fair. Every student gets to face the same opponent and has the same chance at getting a good grade. You can also incorporate multiple opponents of varying difficulty to help differentiate algorithm quality.
Below is an example task description for an assessment sheet using 3 different AI opponents from the Sumo activity in the Micromelon Robot Simulator. We’ve specified that to earn the marks associated for beating the AI opponent you must win a best of 3 series against that opponent. This prevents unexpected upsets when mistakes happen e.g. student’s unintentionally incapacitate or disqualify their own rover. You can see how partial marks can be allocated here if students aren’t able to defeat an opponent consistently. For example, if a student can beat “El Capitan” only once, you can allocate 1 mark or 1.5 marks.
Your objective for this assessment is to design, program and reflect on an algorithm that will run on a Micromelon Rover to compete in the Sumo Arena. Your sumo algorithm must make use of at least 3 of the rover sensors:
Ultrasonic Sensor
IR Distance Sensors
Colour Sensors
Accelerometer
Gyroscope
Once you have finalized your sumo algorithm , you may battle the three AI opponents. You cannot change your algorithm between battles. The opponents and marks for defeating the opponent in a best of 3 series are:
Defeat the “EZ-PZ” AI 2 times out of 3 attempts (4 marks)
Defeat the “Artemis” AI 2 times out of 3 attempts (3 marks)
Defeat the “El Capitan” AI 2 times out of 3 attempts (3 marks)
Supporting Documentation
It can be a good idea to give students a chance to demonstrate their understanding of the programmatic thinking required to create an algorithm outside of code. This will give students who may not have beaten their sumo opponents or are still struggling to translate programmatic thinking to actual written code the chance to demonstrate a satisfactory achievement level. A supporting document that is submitted with their sumo algorithm is one way to do this. The form of this document is up to you, what’s important is students explain the thinking behind their algorithm.
Supporting documentation which walks through how an algorithm works and what data is used can be submitted before or after the sumo code is actually written. If it is submitted before, students will have a chance to think through how their solution will work before jumping into code.
Here is an example task description for a potential supporting document,
The algorithm design flowchart will explain how you intend to program your sumo algorithm. It will be completed before you begin programming. The flowchart should outline the steps your Rover follows when executing your algorithm. Your flowchart should show where you’ve used:
Branching ( IF/ELSE statements ) (3 marks)
Iteration ( Loops ) (3 marks)
Data from sensors, including what type of data the sensors generate. (4 marks)
Assessing The Code Itself
It’s necessary to look at the code produced by students but also important not to judge a program just by it’s code quality. As with all programming assessments, it’s hard to judge the quality of an algorithm based entirely on how many lines of code or how clean the code looks. Two different programs may run with the same speed and efficiency, but the code may be completely different. It’s a good idea to check students' code to make sure they are producing a genuine algorithm and not a hard coded solution, but we wouldn’t recommend creating marking criteria solely based on how the code is written. Instead, provide marks based on if and how the algorithm competes in the sumo arena and on how students explain and understand the code as we’ve outlined in the previous sections.
Example Assignment Sheet
Below is an example assignment sheet you can use your classroom. You can use this template as a starting point for designing your assessment. The ruleset we have outlined above is also included.
Building Knowledge Needed For Sumo
If students are not at the skill level yet to write a Sumo algorithm, we’ve outlined a general structure of how you can teach the skills required incrementally. Start at the step which feels most appropriate for how familiar your students are with coding in general and using the Micromelon Rover. These steps don’t have to be rigid lessons, you may cover multiple steps in a single lesson or delegate some tasks to homework. In the outline we will mention some potential activities you can run with your class, all of these activities can be run in the Micromelon Robot Simulator.

Micromelon Robot Simulator
The Robot Simulator
The simulator is a virtual world we use to simulate a real Micromelon rover and many fun coding challenges. We will choose to use the Simulator because it has already built in activities that work perfectly for learning sumo as well as a sumo arena that has AI opponents and rover attachments.
If you’re looking for information on how to get started with the Robot Simulator, check out our Getting Started With The Simulator post
Step 1: Rover Movement
The primary challenge of the maze is to navigate the path formations. To deal with these path formations, students will need to be familiar with how to program the Rover’s motors to move and turn the Rover.

Activity: Driving Shapes
Activity
If your students have no knowledge of Micromelon Rover’s and how to program them, start with the activity Driving Shapes. This is a beginner activity which has students learn the basics of moving their Rover forwards and turning with the potential for some loop usage. You can run this activity from the Free Roam exercise in the robot simulator.
Step 2: Introducing The Colour Sensor, Branching and Iteration
Once students have a basic understanding of programming the Rover you can move onto incorporating sensors into some simple algorithms using branching and iteration. This will give students a chance to start getting familiar with incorporating branching and iteration into a single algorithm and also learning how to program the colour sensor. Because the edge of the sumo arena will be detectable with the colour sensor this will be a very important step to cover as it will help students keep their rovers inside the arena.

Basics Of Colour Sensor
Understanding The Colour Sensor
This post will cover some of the science behind how the colour sensor works, the limitations of the sensor and how to code them. Having an understanding of the fundamentals of how colour sensing works will help students implement it in activities.
If you’re limited on in class time, assign this post (and the other Basics of posts) as homework reading before class. You can even ask questions at the start of the next lesson or get some students to present their findings.
Activity
The activities Stop on Colour and Prison Escape are great for learning how to implement sensor data into simple algorithms that use branching logic and iteration. Both of these activities are built into the Robot Simulator.
The complexity of program necessary for completing these activities will be similar to the programming of a very basic sumo robot.

Step 3: Learning about Distance Sensors & More Complex Algorithms
A key part of any sumo algorithm is being able to locate the opponent in the ring so you can’t attack them. The front ultrasonic sensor and two side IR sensors are all distance sensors that we can use to detect the proximity of objects, including the opponent rover. Having a thorough understanding of how these sensors work is important to a successful sumo algorithm.
Understanding the Ultrasonic & IR Sensor
Knowing the science behind how the ultrasonic & IR sensors work provides students with a knowledge base that allows them to understand the limitations of the sensors and how to use them appropriately. We’ve written a post about each of these sensors that students can read to get familiar with the sensors.


Activities
Maze challenges require distance sensing to complete successfully. In their most basic form solutions for maze solving will require students to understand how to use sensor data in conditional operators. They will also allow students to continue practicing how to use the IF / ELSE / ELSE IF blocks to create branching logic and Loops to repeat sections of code.
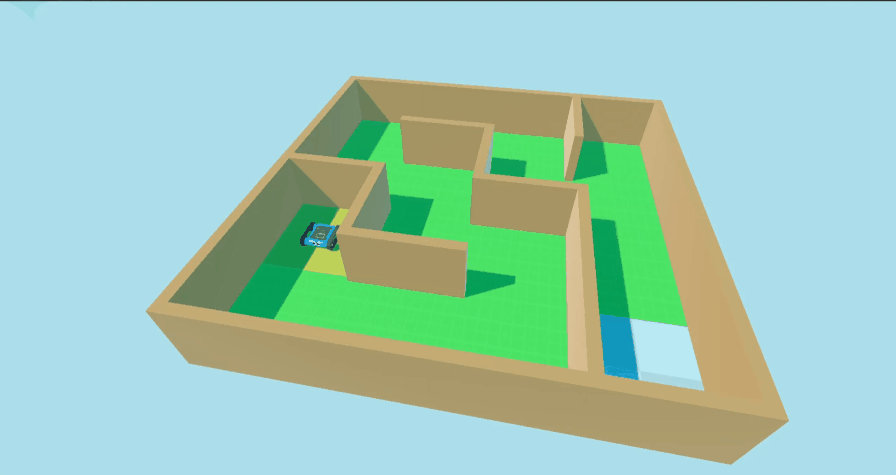
Activity: Maze Solving
Step 4: Practicing In the Sumo Arena
Once students are familiar with how to use all the sensors required and are familiar with branching and iteration it’s a good time to jump into sumo battles. Treat this as a time for students to start sparing and iterating on their sumo algorithms. No perfect algorithm was ever created in the first try. The more time students have to battle the more effective their sumo algorithms will become. If you’re using the robot simulator the students can practice their algorithms against the built in AI rovers.
Activity: Sumo
Wrapping Up
In this post we’ve covered what Sumo challenges are, what they teach, how to assess them and how to prepare our students for them. Hopefully from here you can incorporate Sumo into your digital technologies classroom.
If you’ve got any questions about running Sumo challenges or about Micromelon Robotics please feel free to reach out the Micromelon team.
Related Posts


